Showing posts with label winter. Show all posts

Wednesday, December 8, 2010

Cranberry Apple Pear Crumble

A couple of months ago, when we had some guests for the weekend, I came up with a nice dessert for the four of us. Quick, easy, very customizable, and of course delicious! Seems like it would make an even better dessert now that the nights are getting chilly here. And I think this would also make a really good pie filling.

Serves: 4

What you need:

For the insides:
-2 chopped apples (I used one Gala and one Red Delicious)
-1 chopped pear
-1/4 cup dried cranberries
-1/4 cup of sugar
-1/4 to 1/3 cup of flour (Adding more flour will make the juices thicker, so this depends on how thick you like you filling to be.)
-1 1/2 teaspoons of vanilla
-1/2 teaspoon cinnamon

For the crumble:
-4 tbsp softened butter
-2 tbsp white sugar
-2 tbsp brown sugar
-4 tbsp flour
-1 teaspoon cinnamon

1. Preheat the oven at 350 degrees.

2. Mix the ingredients for all the insides together in a large bowl then split them up amongst 4 ramekins.

3. Mix the ingredients for the crumble together and top evenly among the ramekins.

4. Place the four ramekins on a cookie baking sheet (for easier clean up and transporting in and out of the oven). Bake until the crumble starts to brown.

5. Optional, top with one scoop of ice cream! (We did heath bar crunch.)

Tuesday, December 7, 2010

Decorating for the Holidays

I guess I'm a little late on this considering Hanukkah is already almost over, but better late than never!

We transformed our apartment from Thanksgiving to Christmas themed the day after Black Friday. Unfortunately, because we won't be here Christmas morning we didn't buy a Christmas tree. The extent of the decorating consists of a lawn ornament, wreath, lights & some ornaments in the window, and a few knick-knacks placed around downstairs. Last year on the other hand we went all out because we hosted Christmas at our place back East. We hung up garland and set up a really nice tablescape too. I think it'll be awhile before we get to do that again...

Since we aren't really getting into the decorating this year, I lived vicariously by going to Crate and Barrel.com and picking out my favorite decorations they have for the season. It's cheaper that way, anyway. Haha.


Saturday, November 6, 2010

Top 5s of Partying and Entertaining: Part 4 - Holiday Drinks

So how many people have a special drink made at their wedding? I considered having this done because fun drinks are always a good thing. Who wouldn't like drinking a neon blue drink out of a martini glass that's named after them and their new spouse? I think people didn't notice that I was too overwhelmed with other planning things, school, and life to ever request that:


Whenever Nick and I have parties we try to do the special drink of the night thing. Most of the time people just bring beer and drink that, but it's nice to have the option and when you have themed parties of there is a holiday, it adds to the festive mood.

Speaking of Holidays, this Top 5 list of drinks are drinks (from various websites and my family) that would be great to serve this holiday season. So grab your Bar Shaker and let's go! (Remember to drink responsibly, and one drink=above the legal limit to drive.)

Top 5 favorite Cold Holiday Drinks

1. Butterscotch Chocolate Martini - Nick may kill me for telling you think, but our favorite specialty martini is this one which I created for our apartment warming party when we first moved in together. I think we were the only one's who drank it, but it was still delicious. Beware, this is STRONG:
- 1 part vodka
- 1 part milk
- 1/2 part butterscotch liquor
- Chocolate syrup (amount needed depends on how chocolatey you want it ;) )
- 2 ice cubes
Just add to your shaker, shake, and pour.

2. The Apple pie - This drink reminds me of college because for someone like me who hates the taste of most alcohol, this was my best option if I did want to drink.
- 1 part apple juice (or apple cider, but not hot because you'll burn off the alcohol)
- 1/2 part Goldschlager
- For an extra kick, you can add apple flavored vodka too but it's not necessary.
- 2 ice cubes.
This one can be shaken or stirred.

3. The Italian - Is there a better name for this? Probably, but this is something Nick (who is half Italian) likes to drink at Christmas since it is a family/Italian tradition for good luck, so I've name it after him.
- Sambuca (in a shot or cordial glass)
- 1-4 coffee beans
Add all to glass. Sip responsibly.

4. Pumpkin Pie - This drink I found from Drink of the Week and it looks absolutely amazing. I will probably be making some of these at Thanksgiving this year.
- 1 oz. Malibu Rum
- 3/4 oz. canned pumpkin pie filling
- 1/2 oz. Kahlua
- 2 oz. with cold milk
Mix ingredients in blender with ice and blend thoroughly on the "liquify" setting. Pour into graham cracker-rimmed highball glass and garnish with some whipped cream and a sprinkle of cinnamon.

5. Wintertime Mimosa - You may not realize this, but some oranges and citrus fruit are actually in season during the winter. So even though this may seem like a summer time recipe, this could be the perfect drink to have on Christmas morning when you're opening up presents.
- 1 part orange juice
- 1 part cranberry juice
- 1 part champagne
Because of the bubbles in the champagne, you do not need to stir this otherwise you will take out the bubbles. Instead, pour all the ingredients into a pitcher (or right in to your champagne glass) and serve!

Top 5 favorite Warm Holiday Drinks

1. The Girl Scout - I've also heard this recipe called the Peppermint Patty (but that drink to me is just a shot of Peppermint Schnapps with chocolate syrup added in). Regardless of what you call it, this recipe is super simple, just make sure you don't give yours to the kids by accident!
- One packet of Swiss Miss (or whatever sweet hot chocolate brand you prefer_
- Milk
- 1-2 shots Peppermint Schnapps
Make the hot chocolate as you would normally (but make sure you use milk) and add the Schnapps at the end. This looks great in an Irish Coffee Mug garnished with whipped cream and a bit of shaved chocolate or cocoa mix on top.

2. Hot Toddy - This might be the most common and traditional of winter time drinks. Great when you want to relax, need some soothing liquid when you have a cold, or just for fun with friends, there's a reason it's a classic! (This recipe comes from About.com
- 1 oz brandy, whiskey or rum
- 1 Tbsp honey
- 1/4 lemon
- 1 cup hot water
- 1 tea bag
Coat the bottom of a mug or an Irish coffee glass with honey. Add the liquor and the juice of the lemon quarter. On the side, heat water in a tea kettle and add the tea bag to make hot tea. Pour the steaming tea into the glass and stir.

3. The Daddy (also known as Irish Coffee) - Just like the Italian is named after Nick, this is named after my dad. For years, every Holiday my dad breaks out this drink. I would guess that this is his one of his favorite parts about the Holidays, and now he's converted Nick too (not that this is a bad thing).
- coffee
- 1-2 shots of Bailey's Irish Cream (or Kahlua)
Make your coffee however you like it, then just add the liquor to your drink. Tada!

4. Hot Egg Nog - Since my recipe for Egg Nog was given to me by a very good friend, I don't want to share in case it's a secret. But I did find this drink called a Tom and Jerry, that could be a nice warm alternative.
- 1 Egg
- 1/2 oz simple syrup (or 1 tsp Powdered Sugar)
- 1/2 oz of Brandy or Cognac
- 1 oz of Dark Rum
- Hot Milk (or water)
Start by separating the Egg and then beat the egg yolk and egg white separately. Fold these two together into a mug. Add Simple Syrup (or Powdered Sugar). Add Brandy or Cognac and Dark Rum. Top off the mug with hot Milk or hot water and stir. Garnish by sprinkling Nutmeg on top.
Side note: I have not made this recipe, but I would be careful about the temperature of your hot milk, just to make sure you don't cook the egg.

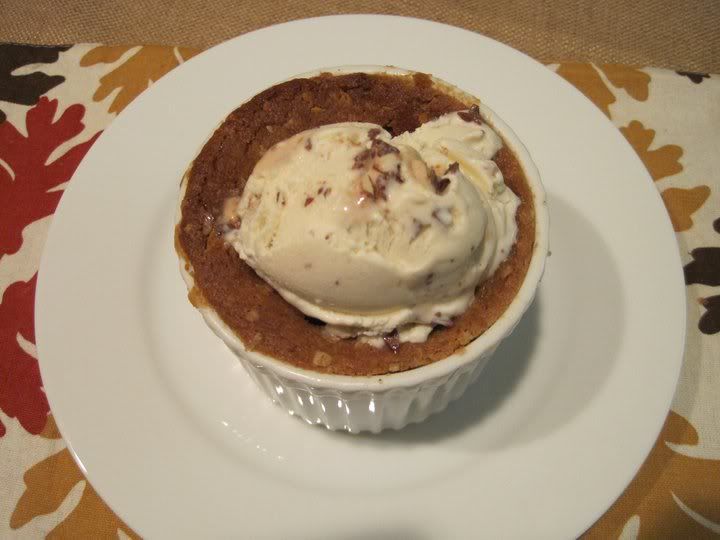
5. Hot Buttered Rum - Another traditional winter time drink, but I like the twist on this recipe from the Food Whore. Ice cream!
- 1/2 c. butter, softened
- 1/2 c. brown sugar
- 1/2 c. sugar
- 1 tsp nutmeg
- 1 tsp cinnamon
Cream together mix into 1 pint of vanilla ice cream. Store in freezer. Next boil water. When the water is boiled remove from heat and scoop out about 3 tablespoons of the batter and add 1-2 shots of rum. Then fill the rest of the glass with the water.
Side Note: I don't like boiling hot liquids since my mouth always gets burned. You could always just heat up the water until right before it boils if you're worried about that.

Sunday, October 31, 2010

Butternut Squash & Pumpkin Soup

I am so stressed out right now. I have a midterm in my Research Methods class on Tuesday and I want so badly to do well. I've been studying, going to/having review sessions, and doing my best to prepare. But today, I hit a wall and had to do something to release the tension I'm feeling right now. When my study group comes over, we all contribute something and have a very nice meal in the middle of our studying. So I think I used today's break to do some stress relieving via cooking. I made a quiche, a salad, and soup. Nothing too crazy and involved, but in complete silence, I just spent 2 hours in my kitchen cooking, cleaning, and generally being as calm as possible.

I had some leftover squash and needed to make something with it so created a soup recipe based off of one in my Barefoot Contessa cookbook that Nick got me for Christmas last year. It is Butternut Squash and Pumpkin and it came out much better than I thought.

Ingredients:
- half of a Butternut Squash
- 1 sugar pumpkin
- 1 half of an onion
- 2 tablespoons of butter
- 1 tablespoon of olive oil
- 1/2 cup of cream
- 2 1/2 cups of chicken or vegetable stock
- 1 1/2 tablespoons of brown sugar
- 1/2 tablespoon of cinnamon (or more depending on taste)
- 1 teaspoon of nutmeg
- 1/4 teaspoon of ground ginger
- 1/2 teaspoon of ground cloves

1. Pre-heat your oven to 350 degrees. Cut your squash and pumpkin in half and scoop out the pulp and seeds. Place directly on oven rack and roast for 45-60 minutes. You'll know it's done because the insides will be soft when you poke it with a fork.
2. When you have about 10 minutes left for the squash to cook, melt butter and olive oil together in a medium-large pot (you don't need a soup pot for this). When the butter is melted add your sliced up onion and cook.
3. Once the squash and pumpkin are done cooking, remove from the oven and scoop out the edible insides (ie. you don't need the skin).
4. First put the butternut squash in a blender and add the cooked onions (leave the butter and oil in the pot). Add one cup of stock and blend until liquified. Once this is done, dump it back in your pot. Next take the pumpkin and repeat the same process with one more cup of stock.
5. When everything is back in the pot (and the heat turned on low), add the last 1/2 cup of stock and the 1/2 cup of cream. Then add your seasonings. (I didn't add salt because the stock itself was very salty.)
6. Taste test and see if you need to add any more seasonings. Nick and I thought it needed a bit more cinnamon, so we did another sprinkling, but not everyone likes their squash soup with that much.

We cut up some sourdough bread and dipped it and it tasted so good. I'm not a big fan of broth soups, and I made chicken soup last week, so I'm really happy to have something else in the house. The fall and winter are obvious great times for soup eating, and what better soup to celebrate Halloween with than with the seasonal vegetables of pumpkin and squash? I guess my stress was good for something!

Hope you enjoy it!

Tuesday, September 28, 2010

Rosemary Chicken with Apple Salad and Onions

If you have not already done so, please look to the left of the entry and see the poll I've started. I have tons of entry ideas, but I'm just curious as to what people actually want me to write about. If you have a second, please take the time to answer the poll this way I know where to tailor my entries. Thanks!

--***--


I hate chicken, and since we don't eat meat I rarely eat it. But about 2 months ago my parents and I checked out a new local farmer's market back home and my mom suggested I make dinner. They all eat meat, and the meat there was local, so I picked out a few things and made an awesome meal that even I, who has NEVER liked chicken EVER loved.

I plan on making this again for Thanksgiving (because I know I would never like turkey, and it was a fluke that I even like this chicken). But since I made up the recipe on the spot, I'm doing my best to attempt to explain it now as a way to share the recipe and recreate it again the next time...that sounds bad, but I've got high hopes it'll turn out fantastic.

For Chicken:
1 whole chicken de-gutted
1 bag of pearl onions
Several full cloves of garlic
rosemary
olive oil

For Apple salad:

1 1/2 gala apples (peeled and chopped up)
1/2 stick of butter
1 1/2 tablespoons of cinnamon
3 tablespoons of sugar
1/2 c walnuts (I'm trying to remember if these were actually in there or not, maybe??)
1/4 c golden raisins
1/4 c regular raisins
3/4 cup sweet white wine or apple juice

Preheat oven 350 degrees.

1. add 2 tablespoons of olive oil. When it starts to get hot add the apples. Give them a stir and after one minute add 4 tablespoons of butter. When the butter begins to brown add the sugar and cinnamon. When the sugar begins to caramelize (that's when it bubbles up like it's boiling), add the wine. After you cook it for 2 minutes add the raisins and walnuts.

2. Cook the apple mixture for 5-8 minutes. Let some of the liquid evaporate, but not all of it. When it's done, spoon out the apple with a slotted spoon into ta big bowl and continue to let the contents of the frying pan cook. Keep your slotted spoon handy and keep stirring it so the liquid doesn't burn. Basically you're trying to make a little syrup, so you want it to be thick. When it's done pour that into the bowl with the rest of your salad.

3. Next, take the skins off all the onions and set them aside.

4. Time for the chicken! cover the bottom of your roasting pan/bakers dish whatever with a little bit of olive oil. Put the chicken on top. Then put some olive oil on top and inside. Next put some salt and rosemary on top and on the bottom of the chicken. Make sure you rub it in. Then put some rosemary in the middle of the chicken (I don't put salt on the inside) (that you don't have to rub in if you don't want to, haha). Put a few cloves of garlic on the inside of the chicken and around the dish as well as a couple underneath. I'd say 6-10 total depending on the size of the cloves.

5. Now stuff the chicken with some of the apple salad and onions (don't over stuff it though, maybe 3/4 full), then put the rest in the dish around the sides of the chicken. If you have any leftover juices in your bowl from the apple salad dump that on top of the chicken. I also like to lift up the chicken to let some of the juices flow underneath then set it back down without letting anything get stuck underneath.

6. Cook until the chicken is cooked. Thanks to the apples and the juice/wine from the salad, this will be juicy enough that you shouldn't have to baste or anything.

7. Enjoy!

I think this recipe is big enough for a chicken that'll feed 4-6 people depending on appetite and the kinds of sides you include (we had this with butternut squash ravioli which was a really good match, but I could also see having mashed potatoes as well). So you can always add more or less depending on what you need.

Thursday, September 9, 2010

Smoked Gouda and Bacon Macaroni and Cheese

My favorite way to cook is to take the basics of a recipe and change them around to make my own. Growing up, my parents generally cooked the same things all the time so I learned how to make those things just by watching them, but if I wanted to expand and learn to make all sorts of other yummy meals I had to figure them out myself. I think that tweaking things to make it your own is the easiest way to develop your own set of recipes and yourself as a cook because you've got the basics laid out in front of you, you just need to take it and run with it. I'm now at the point where I just reference my standard cookbooks for temperatures and times of how long to put things in the oven and use my specialty cook ones for ideas.

One cook that I love is Ina Garten (from the Barefoot Contessa Food Network TV show). I'll admit, for some she can be hard to take, but I love french food and I love how she presents everything. So she's one of the shows I like to watch a lot (along with Sandra Lee, Giada De Laurentiis, and Paula Dean). This is a recipe for a more adult version of Mac and Cheese that I have surprisingly found that all the picky eater kids in my family absolutely love. Must be the bacon...

You will need:

* 1 pound cavatappi
* 1 quart milk
* 6 tablespoons (3/4 stick) unsalted butter, divided for sauce, and 4 tablespoons (1/2 stick) for breadcrumbs
* 1/2 cup all-purpose flour
* 8 ounces Gruyere cheese, grated (2 cups)
* 8 ounces Smoked Gouda cheese, grated (2 cups) (in all honesty, this cheese is the star of this dish. You need at least 8 ounces, but if you put in more, this will only taste better. I recommend going for the biggest block you can find in your store and going from there. I think Trader Joe's has the best for the cheapest price and Whole Foods is over priced, so if you can't go to TJ's then just get it from your regular super market.
* 1/2 teaspoon nutmeg
* 1/2 pound bacon (this also tastes just as good without the bacon if you don't eat meat)
* 1 1/2 cups fresh potato bread crumbs (4 slices)

Directions

Preheat the oven to 375 degrees F.

Make bacon in a frying pan, and only cook it about half way. When it's done, after letting the bacon cool a little while, chop/rip it up in to little bite sized pieces.

Meanwhile, heat the milk in a small saucepan, but don't boil it. In a large pot, melt 6 tablespoons of butter and add the flour. Cook over low heat for 2 minutes, stirring with a whisk. Still whisking, add the hot milk and cook for a minute or two more, until thickened and smooth. Add the Gruyere, Smoked Gouda, and nutmeg while sauce is on the lowest heat setting. This is the most labor intensive part of the dish and takes the longest because that is a lot of grating. I get my husband to help me with this part because otherwise it would take me almost 2 hours from start to table.

While you're making the sauce, make the pasta according to the box.

Put the macaroni and bacon in to your very large casserole dish. Then add the sauce and stir well.

Melt the remaining 4 tablespoons of butter, combine them with the fresh bread crumbs, and sprinkle on the top. You can make the fresh bread crumbs by just putting them into a food processor. It's really important you use fresh bread crumbs because dried ones with or without seasoning ruin the taste and texture. The fresh bread crumbs become really sweet and crispy and dried ones don't absorb the flavors as much. If you don't want to do it, then just skip the step. Don't use the other stuff!!

Bake for 30 to 35 minutes, or until the sauce is bubbly and the macaroni is browned on the top.

Enjoy!
Related Posts Plugin for WordPress, Blogger...